The Ultimate Guide: How to Create an Educational App


The educational app industry has already made billions in 2022 alone and is expected to grow at an 8.9% CAGR from 2023 to 2030.
Thinking of building your own educational app to tap into this huge market potential?
This guide is for you!
The sector’s rapid growth isn’t without its reasons. We all know that there was a major shift in learning behaviors in recent years due to the global COVID-19 pandemic, and at the same time, there were also rapid advances in technology. AI and machine learning technologies, for example, have enabled educational apps to provide custom-tailored, on-demand, and accessible lessons that can cater to the individual’s unique needs and preferences.
In this ultimate guide to building an educational app, we’ll discuss everything you need to know about designing, building, and running an educational app that captivates learners.
Here at A2 Design, we have the expertise and experience in developing user-focused educational apps, and we are ready to be your partner in this journey. A2 Design will collaborate closely with you to transform your unique vision into a reality.
By the end of this article, you’ll have learned about:
- Defining a purpose, choosing a niche, and identifying target learners for your educational app
- Crafting an effective curriculum and learning content
- Designing an intuitive and user-centric UI/UX
- Choosing the right technology stack for developing your app
- Actionable strategies for launching, promoting, and monetizing your educational app

A successful educational app isn’t one that tries to please everyone: it should be built to cater to a specific audience. Understanding your educational app’s purpose will help you understand the audience you should target, so you can design an app that resonates with this specific target learner.
This initial phase of defining the app’s purpose is a very important foundation for the app’s success, ensuring you can align your vision with real-world needs.
1) Defining Educational Goals and Objectives
What specific knowledge, skills, or expertise should the users acquire after using the app? This is a very important question to answer first.
Below are a few examples:
Language Learning:
- Knowledge: Expanded vocabulary, grammar rules, cultural insights
- Skills: Conversational fluency, reading comprehension, writing proficiency
- Outcomes: Ability to communicate in a new language, pass proficiency tests, travel confidently
STEM (Science, Technology, Engineering, Math):
- Knowledge: Scientific concepts, mathematical formulas, programming principles
- Skills: Problem-solving, critical thinking, data analysis, coding proficiency
- Outcomes: Improved academic performance, preparation for STEM careers, ability to build and create
Professional Development:
- Knowledge: Industry trends, leadership strategies, communication techniques
- Skills: Project management, negotiation, public speaking, time management
- Outcomes: Career advancement, enhanced productivity, increased earning potential
Creative Arts:
- Knowledge: Music theory, art history, literary analysis
- Skills: Playing an instrument, drawing/painting, creative writing
- Outcomes: Artistic expression, stress reduction, enhanced creativity
Health and Wellness:
- Knowledge: Nutrition guidelines, exercise techniques, mindfulness practices
- Skills: Healthy cooking, stress management, meditation
- Outcomes: Improved physical and mental well-being, weight loss/management, reduced anxiety
Test Preparation:
- Knowledge: Test-specific content, strategies for answering questions
- Skills: Time management, critical reasoning, test-taking confidence
- Outcomes: Higher test scores, admission to desired schools or programs
2) Identifying the Target Audience
Now that we’ve defined the app’s purpose and goals, we can start identifying its target audience. You can follow these steps”
- Redefine Learning Objective: Redefine what you’d like the users can learn from this app. Will it focus on the development of specific skills, preparation for a test, or even learning a new hobby? Clearly defining the learning objective—or objectives— can help you narrow down the potential target audience of the app.
- Identify Age Group: Which age group will be your education app’s primary audience? Children? Teenager? Adult? Seniors? Knowing your target audience’s age group can help you identify the appropriate interface, vocabulary, and type of content to include in your app.
- Consider Education Level: Is your app targeted at elementary, middle, high school, or university students? Alternatively, is the app intended for adults looking to improve their skills or knowledge?
- Specific Interests and Needs: Identify your target audience’s unique interests and needs. Are they currently looking for a solution for a specific learning problem?
- Competitor Analysis: Analyze similar educational apps to identify gaps/opportunities you may be able to fill. Identify and analyze their target audience.
- Market Research: Use surveys, interviews, and focus group discussions to interact with potential users and gather qualitative data about their needs, preferences, and pain points. Your goal is to identify their pain points and determine how your app can offer tangible, tailored solutions.
- Leverage Social Media: Monitor conversations about education and related topics, which may give you valuable insights into your potential users’ needs and pain points.
- Create user personas: A user persona is a semi-fictional model of your app’s target user. Give your persona a name and personality, and make it as detailed as possible by including the demographics, psychographics, and behaviors you’ve identified above.
A detailed user persona (or personas) can help ensure a truly impactful and personalized learning experience, allowing you to tailor your app’s content, features, and interface to their unique preferences and needs.
3) Understanding Specific Needs and Preferences
Once you’ve identified your target audience and crafted a user persona (or personas), you can dive into more specifics:
- Subject matters: Identify the knowledge or skills your audience is most interested in (i.e., math, science, history, language learning, or a niche area of interest)
- Content format: Determine your target audience’s preferred content formats (i.e., video tutorials, text-based lessons, interactive quizzes, etc.)
- Learning environment: Do your target users prefer self-paced or instructor-led learning? Is it necessary to incorporate social elements like group discussion boards, collaborative projects, and peer reviews?
- Distinctive Edge: What distinguishes your app from the competition? Does it provide original content that cannot be found elsewhere? Is the UI/UX design truly good and intuitive?
An ideal educational app is one that directs students toward their learning objectives. In this part, we’ll look at how to optimize your app’s structure and content delivery to provide a smooth and interesting learning experience.

1) Outlining the Learning Journey
When designing a learning journey for your app, there are a few approaches you can consider:
- Linear Learning: This strategy presents your learning components (modules) in a linear and predetermined order (usually sequential). After completing each one, learners progress to module A, then module B, then module C, and so on. This method works well for disciplines with a clear progression (e.g., language acquisition, mathematics) and is especially helpful for teaching children/beginners.
- Modular Learning: This learning journey structure organizes your knowledge into modules/learning units that learners may engage with in any order. This technique is adaptable and effective for teaching topics with multiple applications (i.e., history) as well as courses with modules that are mostly self-contained (i.e., skill learning).
- Project-Based: This approach involves real-world simulations that require users to use their newly acquired skills and knowledge in meaningful contexts. Ideal for skill development or teaching courses with numerous applications.
- Adaptive: Using algorithms (i.e., AI and machine learning) to tailor each learner’s learning experience based on their specific performance and development. Can be useful in a variety of situations, but is difficult and costly to execute.
2) Choosing Content Types
There are different types of content formats available. Offering the right type that aligns with your learner’s preference can significantly elevate engagement and overall learning effectiveness.
Below are some of the most common formats available:
- Videos: Engaging video lessons, animations, tutorials, and demonstrations can be effective for explaining complex concepts, making them easier to grasp and more accessible in general. Videos cater to auditory and visual learners and can significantly improve engagement.
- Interactive Quizzes, Games, and Assessments: Interactive content can provide a fun way to reinforce learning and assess knowledge/skills. Interactive formats can be effective in testing comprehension and identifying areas where learners need more support. Gamification elements (i.e., badges, scores) can also motivate learners through rewards and competition.
- Simulations and Virtual Labs: Simulations offer a risk-free environment for learners to practice their skills, apply their knowledge, and experiment in a lifelike setting. This approach can be effective in certain fields like engineering, healthcare, and science so we can simulate scenarios or experiments that are otherwise dangerous to recreate in reality.
- Textual Content: While not always the most flashy, well-structured textual content is indispensable for delivering foundational knowledge, summarizing key points, or providing detailed explanations. Text-based content can be easily referenced, and you can add interactive elements like highlighting or hyperlinks to enhance the learning experience.
- Audio Content: Podcasts, lectures, or audio recordings can provide a flexible and convenient way for users who prefer on-the-go learning. For example, students can consume the content while commuting, exercising, or doing other things.
Remember that you can mix and match several formats. Diversity may allow you to appeal to a wider group of people with varying learning methods.
3) Crafting the User’s Learning Path
Ideally, your app should function like a guided tour where its users acquire knowledge and/or skills. Thus, it’s critical to design how the users will navigate and progress through the learning material. A well-defined and optimal learning path can help ensure smooth and logical progression, ultimately ensuring user satisfaction.
Here’s a breakdown of how to achieve this:
- Clear Progression: Create a clear series of modules, classes, or courses and arrange them logically. Typically, you should begin with fundamental principles and then graduate to more complex topics. Clearly state requirements or a suggested order to ensure that learners have the essential core knowledge before moving on to the following subjects.
- Milestones and Checkpoints: Include regular assessments to measure learner’s progress and reinforce learning. If applicable, incorporate milestones and rewards to celebrate the learner’s achievements and maintain motivation. These gamification elements could be badges, certificates, or even unlocking new content or features on the app. Make sure these milestones and rewards are prominently displayed.
- Progress Tracking: Create a comprehensive and unambiguous progress monitoring system. Users should be able to easily track their learning history/progress, see their achievements, and establish objectives for future development.
In the next phase, we’ll discuss how to craft an intuitive and visually engaging user interface (UI) and experience (UX). We’ll explore how to design an app interface that can enrich its user’s learning experience and improve engagement.
3. Designing the User Interface (UI) and User Experience (UX)A well-designed user interface (UI) and user experience (UX) are very important foundations of any successful educational app.
An intuitive UI/UX that is easy to navigate and caters to the learners’s unique needs can help create an engaging, effective, and enjoyable learning experience for users.

Below, we’ll look at some practical suggestions for creating an excellent UI/UX for your school app.
1) Designing an Intuitive User Interface
- Clear Navigation: Ensure that users can simply and quickly find the content and features they are looking for. Create a clear and well-structured navigation menu with a logical flow.
- Well-organized Layout: Arrange visual components (buttons, icons, photos, and text) in a logical and organized manner. Focus on providing consumers with an easy-to-use and
- Consistent Design: Ensure consistency in color, typography, and iconography to ensure navigation.
- Attractive Design: Design components should be both consistent and visually aesthetic. To attract users, use appealing colors, fonts, and images that complement the style and theme of your app (as well as the general educational theme).
- Responsive Design: The app’s interface should be displayed correctly (and with optimal functionality) in different devices and various screen sizes. (i.e., smartphone, tablet, laptop, desktop PC, etc.)
2) Ensuring Optimal User Experience
- Organized Content: Group your lessons (and content) by category, lesson difficulty, or progressiuon level to ensure easier use and search.
- Content Diversity and Interactivity: Try to incorporate diverse content formats (video, quiz, games, etc.) to keep learners motivated and engaged.
- Feedback and Reinforcement: As soon as learners finish their tasks, exams, or quizzes, ensure immediate feedback from the app so they can keep track of their progress.
- Personalization: tailor content and recommendations (i.e., lesson suggestions) based on each individual user’s current knowledge/skill level and preferences.
- Accessibility: Use the type of fonts that is easy to read (and large enough) with good color contrasts. Make sure your app is completely accessible by users with special needs. For example, make sure your app is compatible with screen readers to ensure accessibility for visually-impaired users.
The technological underpinning of your educational app must not be disregarded. Choosing the right technology for your educational app is a critical step that will significantly impact its performance, usefulness, reach, and future growth.
In this segment, we’ll go over a detailed guide to assist you make the informed decision in this aspect.
In general, there are two main approaches you can take:
- Native Development
In this approach, each app is created in the native programming language of each platform.
This approach allows for optimal performance for each platform, thorough integration with each platform’s capabilities, and an improved user experience.
However, the development needs two (or more) independent codebases, which increases the cost and length of development time.
- Cross-Platform Development
In this approach, we create a single codebase that can be distributed across numerous platforms. This strategy may be implemented using frameworks such as Flutter or React Native, among others.
Because we simply generate one codebase for all platforms, development time is faster and costs are usually lower.
However, there may be performance constraints, and the app may be unable to access some platform-specific features.
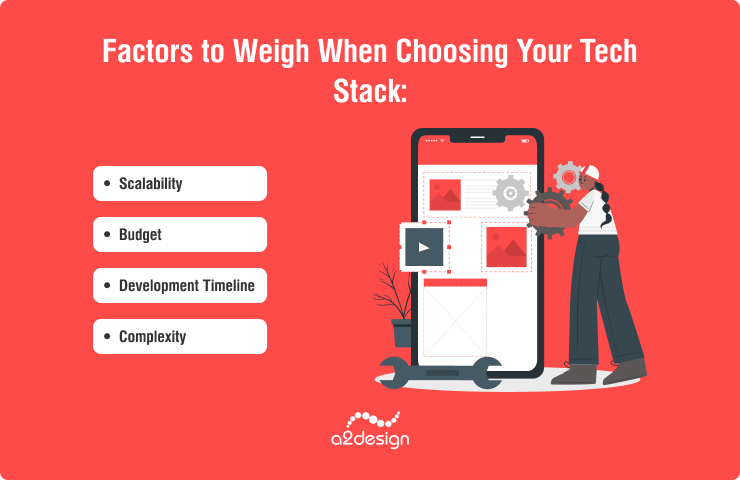
Factors to Weigh When Choosing Your Tech Stack
Selecting the ideal technology stack involves carefully balancing several key considerations:
- Scalability: Make long-term plans. Choose technologies that can handle an increase in user numbers and future feature expansions.
- Budget: Choose a technology stack that is within your budget. Your financial resources will unavoidably influence which technologies are viable for your project. Native development, with its separate codebases, is typically more expensive than cross-platform development.
- Development Timeline: Some technology stacks may allow for faster development time but are more complex and/or costly to utilize, and vice versa.
- Complexity: The features and functionalities you’d like to include in the app may influence the tech stack choice. For example, some frameworks may give you an easier time in developing certain features.
Navigating the World of Programming Languages and Frameworks
There are various programming languages and frameworks available for building the educational app, each with its own pros and cons. Yet, the development approach you chose is the primary influence of your programming language choice. Here are the main options available:
- Native Development:
- iOS: Swift
- Android: Kotlin or Java
- Cross-Platform Development:
- React Native (JavaScript)
- Flutter (Dart)
Feeling overwhelmed by the myriad of options available? Consider partnering with A2 Design. Our experienced developers can guide you through the intricacies of technology stack selection, ensuring your educational app is built on a solid foundation that can grow and evolve alongside your vision.
5. Development and TestingWe’ve finished the planning and conception phases, and in this phase, we’ll start turning the concept into reality.
In practice, your app’s development process should involve multifaceted development and testing phases, which we will discuss below.
The App Development Lifecycle
The development path usually occurs in several distinct stages:
- Prototyping: Building a basic interactive model of the app that serves as a visual representation of your concept. The prototype should contain the app’s core functionalities and be useful for testing your ideas and gathering initial feedback from potential users. This stage may involve:
- Wireframe and mockup designs
- Building interactive prototypes with tools like Adobe XD or Figma
- Initial testing and collecting feedback from testers
- Design and Development: Refining the prototype into a more detailed design, involving:
- Coding and implementation: Writing the app’s core codes based on the design requirements.
- Content Cration: Developing high-quality content (lessons, videos, tests, quizzes, etc.) aligned with the planned curriculum.
- Integration: Integration of third-party systems or APIs required for bhilding the app’s functionality,
- Testing and Quality Assurance: Rigorous testing is paramount to ensure the following:
- Functionality testing: Ensuring all functionalities and features are working as expected.
- Usability testing: Evaluating the app’s ease of use and overall user experience.
- Performance testing: Testing the app’s mobile responsiveness, speed, and reliability during different loads.
- Compatibility testing: Assessing whether the app works smoothly across various devices and OSs.
- Security testing: Identifying potential security vulnerabilities and addressing them.
- Deployment and launch: We’ll cover more about the deployment and launch phase in the following section, but this stage should involve:
- App store submission: Preparing the app for release on Google Play Store, Apple App Store, and other app stores.
- Marketing and promotion: Planning and executing a marketin strategy to generate buzz and attract users.
- Launch: Launching the app to the public.
- Evaluation and Iteration: Based on the feedback received during testing, the development team makes necessary improvements and enhancements:
- Bug Fixes: Addressing any glitches,bugs, and issues reported by users or identified during tests.
- Feature enhancements: Adding new features and functionalities based on evolving trends and user feedback.
- Content updates: Keep your lessons and tutorials fresh, up-to-date, and relevant.
- Performance optimization: Continuously monitor and improve the app’s performance.
Keep in mind that the development lifecycle is a continuous process rather than a set-it-and-forget-it one. Iteration can ensure your educational app remains fresh, relevant, and engaging to its target users.
Ready to build your e-Learning App?
Contact usVision into Reality: The Actual Development Phase
We’ve finished the planning and conception phases, and in this phase, we’ll start turning the concept into reality.
In practice, your app’s development process should involve multifaceted development and testing phases, which we will discuss below.
The development path usually occurs in several distinct stages:
- Prototyping: Prototyping entails creating a simple interactive model of the app that acts as a visual representation of your idea. The prototype should include the app’s essential capabilities and be useful for testing concepts and obtaining preliminary feedback from potential users. This phase might involve creating wireframes, mockups, and interactive prototypes (using Adobe XD or Figma), as well as early testing and obtaining feedback from potential users.
- Design and Development: Refining the wireframes and prototype into a more detailed design, which includes:
- Coding and Implementation: Writing the app’s core codes; integrating the various features and functionalities.
- Content Creation: Creating high-quality material (lessons, videos, exams, quizzes, and so on) according to the specified curriculum.
- Integration: (If applicable) Integration of third-party systems or APIs to help build the app’s functionality and features.
- Test and Quality Assurance: Rigorous testing is critical to ensure the following:
- Functionality testing ensures that all functionalities and features perform as planned.
- Usability testing involves determining the app’s ease of use and overall user experience.
- Performance testing involves evaluating the app’s mobile responsiveness, speed, and dependability under various loads.
- Compatibility testing determines if the software runs smoothly across several devices and operating systems.
- Security testing is the process of identifying and fixing potential security vulnerabilities.
- Deployment and launch: We’ll explore more about the deployment/launch process in the next section, but this stage should involve the following:
- App Store submission: Getting the app ready for publication on Google Play, Apple App Store, and other platforms as needed.
- Marketing and promotion: Developing and implementing a marketing plan to build buzz and attract users.
- Launch: Making the app available to the whole audience.
- Evaluation and Iteration: Based on feedback gained during testing, the development team makes the required modifications and upgrades, involving:
- Bug fixes: Resolving any glitches, flaws, or issues reported by users or discovered during testing.
- Feature improvements: Addition of new features and functionality in response to growing trends and/or user input.
- Content updates: Keeping your lectures and tutorials fresh, current, and relevant.
- Performance optimization: Continuously monitoring and improving the app’s performance.

After thorough development and extensive testing, the next step is to launch your instructional app to the public. This includes a planned combination of deployment, launch, and marketing measures to guarantee that your app reaches its target audience and flourishes in the competitive app market.
- Deployment:
- App Store Submission: Follow the guidelines and requirements set forth by the app stores (Google Play for Android, App Store for iOS) when preparing your product for distribution. This involves creating an interesting app description, creating promotional videos, photos, and icons for your app, and setting up a developer account.
- Backend Setup: Install and set up the backend architecture of the app on trustworthy server systems or cloud platforms. Ensure scalability that the system is able to handle an increase in the number of users and storage requirements.
- Security Measures: Establish robust security methods (such as data encryption, secure authentication systems, and frequent security assessments) to protect user data and prevent unauthorized access.
- Launch:
- Soft Launch: Before committing to a full-scale release, consider a soft launch to a limited audience for initial testing and feedback gathering. This allows you to identify and address any remaining issues.
- Official Launch: Publicize the formal launch of the app via press releases, social media, and other marketing channels once it has been extensively tested and improved.
- Initial Promotions: Offer introductory discounts, limited-time offers, or referral programs to incentivize early adoption and generate buzz around the app.
- Marketing:
To effectively reach and engage your target audience, your marketing strategy should be multifaceted and use a variety of tactics.
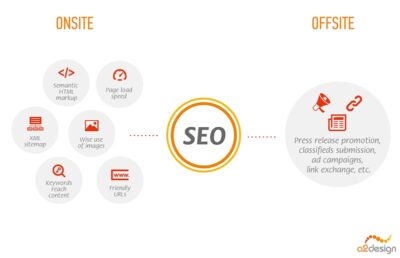
- Content Marketing: Create interesting blog posts, articles, videos, and social media material to highlight the app’s capabilities, advantages, and educational value. Use search engine optimization (SEO) tactics to increase visibility in search results.
- Social Media: Use social media networks to create a community around your app. Share updates, tips, and user-generated material to encourage participation.
- Influencer marketing: Collaborate with influencers or instructors in your industry to market the app to their audiences.
- Email Marketing: Create an email list of prospective consumers and send them personalized messages about the app’s capabilities and benefits.
- Paid Advertising: Consider paid advertising campaigns on social media or search engines to reach a wider audience.
- Post-Launch Engagement:
- User Feedback and Reviews: Actively encourage people to post reviews and feedback. Respond quickly to negative feedback and handle any problems or difficulties that arise.
- Community Building: Set up a community forum or social media group where people can interact, share their experiences, and provide support to one another.
- Updates and Enhancements: Continually update the app with new features, content, and enhancements based on user input and data analysis.
By carefully following these steps and investing in a comprehensive marketing plan, you can effectively build, deploy, and promote your educational app, assuring its success and maximizing its influence on learners.
7. Monetization StrategiesWith your educational app poised for launch, it’s time to contemplate how it can not only educate but also generate the resources needed to thrive. Monetization isn’t simply about generating income; it’s about establishing a resilient business model that fuels ongoing development, ensures content remains fresh, and ultimately, sustains the app’s long-term success.

Exploring Monetization Options
There are several avenues to explore when it comes to monetizing your educational app:
- In-App Purchases: Offer additional content, features, or virtual goods for purchase within the app. This could include advanced lessons, extra practice exercises, or cosmetic upgrades.
- Subscriptions: Provide access to premium content or features for a recurring fee (monthly, quarterly, or annually). This model can create a predictable revenue stream and incentivize users to remain engaged with your app.
- Advertising: Integrate advertisements into your app. While this can be a source of revenue, it’s essential to balance ads with user experience to avoid alienating learners.
- Freemium Model: Offer a basic version of your app for free, with the option to upgrade to a premium version with additional features and content. This allows users to try before they buy, potentially increasing conversion rates.
- Sponsorships and Partnerships: Collaborate with brands or organizations that align with your app’s educational goals. This could involve sponsored content, branded features, or co-created learning materials.
Pricing and Revenue Generation
Determining the right pricing strategy is crucial for maximizing revenue without deterring users. Consider the following factors:
- Value Proposition: What unique value does your app offer? Price your app accordingly, reflecting the quality and depth of its content and features.
- Target Audience: Research the spending habits and price sensitivity of your target audience. What are they willing to pay for educational content?
- Competitive Landscape: Analyze the pricing models of similar apps in the market. Aim to offer competitive pricing while maintaining profitability.
Attracting Users with Free Trials and Freemium Versions
Offering free trials or freemium versions can be an effective way to attract users and give them a taste of your app’s value before they commit to a purchase.
- Free Trials: Allow users to access premium features or content for a limited time, enticing them to subscribe if they find value.
- Freemium Model: Offer a basic version of the app for free, with the option to upgrade for additional benefits. This model can generate revenue from a smaller percentage of paying users while attracting a larger user base.
Strategic Guidance from A2 Design
Selecting the right monetization strategy can be a complex decision with long-term implications for your app’s success. That’s where A2 Design’s expertise can be invaluable.
Collaborating with a seasoned team like A2 Design offers the distinct advantage of tapping into the expertise of seasoned professionals who can meticulously assess your app’s unique strengths and target audience, ensuring the selection of the most fitting revenue generation models. We also provide guidance on pricing strategies, marketing approaches, and user engagement tactics aimed at maximizing your app’s financial potential.
By choosing A2 Design as your partner, you gain a strategic ally who deeply understands the intricacies of generating revenue from educational apps. We are dedicated to helping you craft a sustainable business model that not only supports your app’s growth but also amplifies its impact in the educational landscape.
As you move forward, remember that monetization is an ongoing process. Continuously evaluate the performance of your chosen strategies, gather user feedback, and adapt your approach as needed to ensure your educational app thrives in the ever-evolving landscape of digital learning.
How Much Will It Cost to Develop an Educational App?Starting the road of creating an educational app requires a large financial investment, with expenses changing depending on a variety of factors. A simple software with basic functionality may cost roughly $15,000, but a sophisticated app with extensive functions and cross-platform compatibility might easily cost $300,000 or even more.

Elements Shaping Development Costs
- Scope and Complexity of Features: The number and complexity of features have a direct impact on the cost expenditure. Basic features like as multiple-choice quizzes or flashcards are easier to develop than interactive simulations, gamified aspects, or tailored learning paths, which are naturally more expensive.
- Platform Compatibility: Developing the app separately for many platforms (such as iOS and Android) increases development costs since each platform requires its own development and testing. While you can use cross-platform frameworks like React Native and Flutter can help cut expenses, they may have limitations.
- UI/UX Design: A well-designed and intuitive user interface is critical for educational apps. Investing in expert UI/UX design ensures an immersive and user-friendly experience but at a higher expense.
- Content Creation: Creating high-quality content, including videos, interactive activities, and assessments, requires a significant amount of development time and money. This may be a significant factor affecting cost, especially for apps that store a large quantity of content.
- Backend Development: Building a dependable backend infrastructure can be complex, requiring skilled developers which might be costly.
- Third-Party Integrations: Integrating with learning management systems (LMS), payment gateways, and other third-party services can increase total development expenses.
Additional Cost Considerations:
- Team Size and Location: The size and location of the development team affect expenses. Engaging skilled developers in countries with higher labor expenses automatically increases the budget.
- Marketing and Promotion: To effectively promote the app and reach the intended demographic, further marketing and advertising costs must be incurred.
By carefully evaluating these elements and using cost-cutting methods as needed, you can create a complete budget for your educational app project and set realistic expectations for the financial investment necessary. Remember that investing in a well-designed and compelling educational app may result in significant returns on user acquisition, engagement, and, eventually, educational effect.
Partnering with a reputed development agency that specializes in producing educational applications, such as A2 Design, may help to speed the development process, assure quality, and efficiently control expenses. Their excellent ideas, skills, and resources may help you negotiate the complexities of app development and produce a successful product.
Partnering with a respected development agency that specializes in educational app development, such as A2 Design, may help to shorten the development process and efficiently control costs without sacrificing quality.
ConclusionThis comprehensive guide has looked at the key components of creating an educational app that not only conveys content but also captivates and connects with students. We have addressed a variety of key elements, including:
- Developing a clear objective and knowing your target audience’s specific requirements.
- Creating a well-structured curriculum with captivating content that accommodates to multiple learning styles.
- Create an intuitive and visually appealing user interface that improves the learning experience.
- Selecting the optimal technology stack to guarantee scalability and performance.
- The app will be thoroughly tested and refined in response to user comments.
- Create a thorough marketing plan to reach and engage your target audience.
- Implementing a long-term monetization approach to support the app’s growth.
Each of these phases needs meticulous planning, competence, and a thorough awareness of the educational environment. If you’re ready to take on this exciting path, consider working with a company that specializes in educational app development.
A2 Design is enthusiastic about making your vision into reality. Our team of professionals can help you with every stage of the process, from idea refinement to launch and beyond. We’ll use our expertise and experience to help you design an educational app that not only informs but also inspires and empowers students.
Ready to make a difference in the world of education? Contact A2 Design today for a complimentary consultation. Let’s collaborate to bring your vision to life.
Case Study: TutorTime – tutoring marketplaceTutorTime is one of our online marketplaces we’ve built using top-notch technologies and implementing all the necessary features. TutorTime is an Australian based tutoring marketplace founded by team of expert educators.

TutorTime – tutoring marketplace
The marketplace allows you to choose an individual tutor for any subject within the school curriculum, as well as extracurricular leisure activities (sports, art).
- Tutors can register through the marketplace, pass an interview and offer their services, classes in the areas in which they specialize.
- Parents and students can also register on the marketplace and choose a suitable tutor, book classes, get a homework assignment, and evaluate the teacher after classes.
The tutoring marketplace is available through the web interface and through mobile applications for iOS and Android.
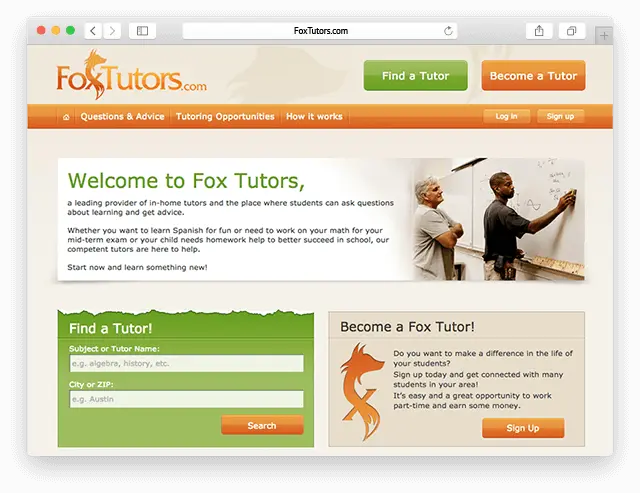
Case study: Fox Tutors – E-Learning Tutoring PlatformFox Tutors was specifically created to connect tutors with students. It offers a fantastic portal that students and parents can use to find the right tutor for their needs.
A2 Design has built the e-Learning tutoring platform from the ground up. It contains a range of different features including marketing tools, a private message application, fraud detection functionality, paid subscription billing, rating system, and geographic search.

